
AIRWOOD Programming Guide
IMPORTANT
Before programming the drone, please ensure that the drone is properly installed and can take off and land stably and hover stably under manual control. Programmed operations can be dangerous if the drone is improperly installed or unstable in flight.
Graphic programming is an educational programming method. There are many graphic programming software in the market.There are relatively well-known examples such as Scratch published by the education team of Massachusetts Institute of Technology. The programming software Mixly we used next is also widely. Compared with Scratch, Mixly has stronger flexibility and freedom in hardware programming, which is convenient for us to program according to our own ideas.Let's take a look at Mixly programming software.
1 Installation
Download and install the driver from: https://webdownloads.oss-cn-shanghai.aliyuncs.com/software/CH341SER.EXE
Download the Mixly software from: Downloads – Woodwow Design
This download package does not need to be installed, unzip it and open Mixly.exe to run.
2 Open
After the software is opened, the software view is as follows:

3 Connection
Use a USB cable to connect the Airwood master to the computer.
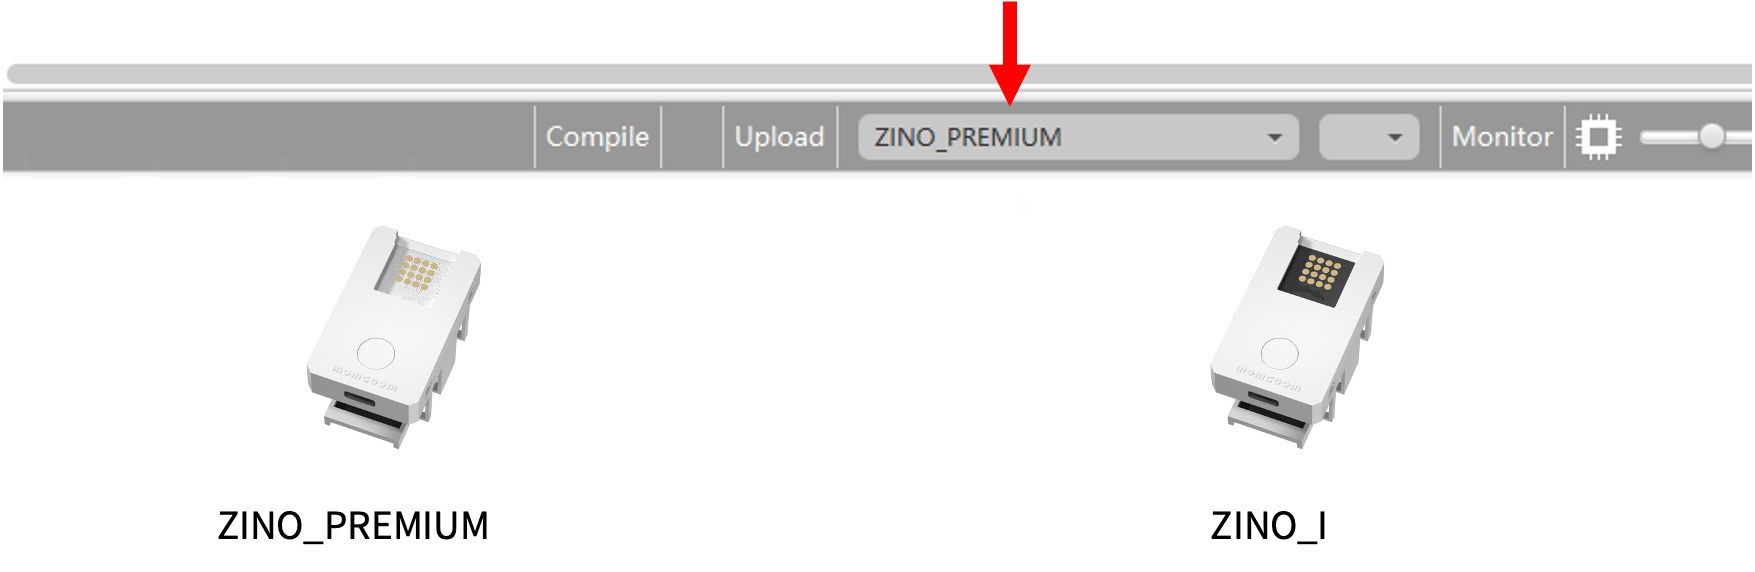
Select the Zino model corresponding to Airwood.
Turn on the ZINO main control power and select the COM Port: When you turn on the ZINO main power, you can see a new COM port here, select it.
If you don't see a new COM port, try unplugging the USB cable and plugging it back in. You also need to check that the driver in step 1 is installed correctly.

4 Build your program
Use the standard library to use common programming instruction module.
Use the ZINO library to use Airwood-specific instruction modules.
Refer to the following links for graphical programming and the use of standard modules:
https://developers.google.com/blockly

5 Airwood Code Instruction
Motion Editor
The programming of drone is different from that of pure software. The execution of drone action is a complex process and takes a certain amount of time. Moreover, the accuracy of execution is closely related to the situation of drone itself. To help you quickly get started with drone programming, we have created a very simple and easy to use programming tool, which we call the Motion Editor, shown below. As the name implies, we can easily use this action editor to achieve action and path editing, without the need to master complex programming logic.

The motion editor consists of three parts:
The ① part is initialization, which has been set by default. Under normal circumstances, we do not need to change it.
Part ② is setting up specific actions.
- We can define different motion combinations. Each motion combination needs to have a unique name. We can select ”A B C D..." from the front drop-down box. And so on with different names.
- We can set whether each motion is executed in a loop or not. If no loop is required, the number of loop is set to 1; if 2 loops are required, the number of loop is set to 2, and so on.
- We can select the button that we want to activate to trigger this motions, and select different buttons through the drop-down box;
- We can select the direction of each flight motion through the drop-down box in front of the motion parameters, including forward - back, left - right, left - right, rise - fall.
- We can set the flight parameters of each flight motion, in which the units of forward - back, left - right, rise - fall are cm, and the units of left - right rotation are angles.
- In the last box of action parameters, we can set the time of each motion interval, which can be filled in 0~60 seconds, with an accuracy of 0.1 second.
- We can add or delete flight motions by right clicking the "+" sign of any module above, click Copy, and then drag it into the desired position. To delete, simply click the "+" sign in front of the motion you want to delete and press the "Delete" key.
The ③ part is the setting of stopping the programming motion. By setting a button, when the drone is executing the flight motion in the ② part, we can stop the continuing execution of the motion through this button. If we don't need to stop the motion, we can also remove this part of the module.
It should be noted that the motion editing here does not include take-off and landing. After we upload the program to the drone, we need to unlock the program first and then complete the take-off. The program motion can be performed normally by pressing the trigger button during flight.
At the same time, we can set up several different sets of motions by copying the module in Part ②, selecting different combination codes and different trigger buttons. If the same button is needed to stop different actions, the command module of “drone combos programming action 'X' 'stop'" can be put into the same module.
Programming learning
If we need to learn specific drone programming, we can learn it through the instruction of "Programming learning" library. These instructions disassemble the flight control of drone, and we can learn and master the knowledge of drone programming flight through these specific instructions. The basic drone programming learning instruction is shown in the figure below.
1)

The initialization instruction is usually attached to the top of the entire program. The instruction has no return value and will automatically start after execution. The initialization instruction is the instruction that every program must first use when using the programming module to tell the system what module we are using. All instructions in the flight control library will not work properly if you do not use the initial instructions.
Please refer to the figure above for the specific setting method. If you choose the wrong way, the UAV may fly normally.
2)

To check whether the button of the remote control is pressed down, you can select the button you want to detect and the state you want to detect. If you select ”button pressed" and the corresponding button is pressed down, the output is "true"; if you do not press down, the output is "false". Note that if the button is not released, the input will continue to be true.
3)

This instruction is a collection of if judgment and button detection. Internal instructions are executed when a button is pressed or when two buttons are pressed.
4)

The command can control the one-click takeoff of the drone and automatically detect whether the takeoff process is complete. The drone must be unlocked before use. After successful takeoff, there is a 1 second interval before subsequent instructions can continue.
5)

Both of these two commands can control the one-click takeoff of Airwood, which can only be used when the drone is in flight. However, when multiple instructions are combined, the left instruction will skip the previous instruction and land directly, while the right instruction will wait for the completion of the previous program before landing. When the landing is complete, the drone automatically locks, so no other commands can be superimposed under this command.
6)

This command is similar to the action parameter setting of the action editor, which can control the drone to fly a relative distance or Angle in the specified direction. Multiple action commands can be stacked up and down, and the system will automatically perform flight actions from top to bottom. By default, there is a 1 second interval between each action. This command can only be executed once per startup. If it needs to be executed repeatedly, the drone needs to be restarted.
7)

This command can control the drone to fly to a fixed coordinate point. Where, the origin of coordinates is the take-off position, and the z-axis corresponds to the height of the drone, which must be positive. The axes of X and Y are shown in the figure.
It should be noted in particular that the coordinate direction of X and Y is based on the drone itself. During the use of this instruction, the heading Angle of the drone cannot be changed, otherwise the coordinate system of the drone will be changed, resulting in the loss of the previous coordinates.
After each instruction is completed, there is a one-second interval before the execution of subsequent instructions continues. This command can only be executed once per startup. If it needs to be executed repeatedly, the drone needs to be restarted.

5 Example
